Taboo XT home
Taboo XL home
Construction notes
Construction tips
Ordering info
|
Aileron flutter can be a problem for full span ailerons on a DLG model
at high launch speeds. It is especially
true when launching a ballasted DLG model in strong winds, when the outer
wing panel reaches speeds well in excess of 100 mph. Aileron flutter
exibits itself as high frequency oscillations of the outer aileron which
can be heard as a low pitch buzz right after releasing the model. If
left uncured, this problem may cause premature servo failure. Even if no damage
is imparted to the model or the servos, flutter reduces your launch altitude
considerably.
The two main reasons for aileron flutter are 1) slop in the control system
(gear lash, pushrod slop), and 2) insufficient aileron torsional stiffness.
Make sure that your
control system is as tight as possible before you start reinforcing the
ailerons. Remove all slop from the servo and control horn holes by applying CA
to the hole and then breaking the pushrod free again. You can't do much about
servo gear lash short of replacing the servo with a better one, so you will
have to live with that. If tightening the control system did not help,
the only solution is facing the aileron leading edges with fiberglass.
This
creates a shear web between the skins of the aileron and inreases its
torsional stiffness by over 50% which practically eliminates the possibility of
aileron flutter.
|
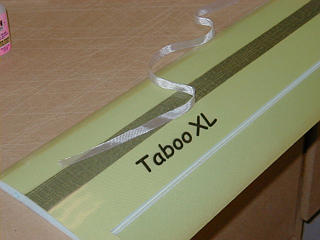
Start by preparing a strip of fiberglass slightly wider than
the the thickness of the aileron. The strip must be cut at 45
degrees to the fibers. Use a sharp X-acto knife and metal
straight edge to cut the strip. Be careful when handling
the strip as it is very easy to deform it by stretching
and nearly impossible to return it back to the original
shape. Use a tight weave fiberglass with 2oz/sq.yd. weight.
|
|

|
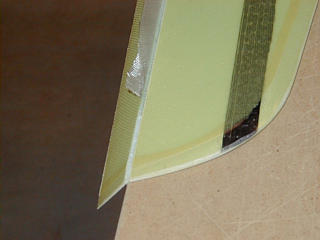
Position the wing panel on the table so that the aileron is
hanging off the edge and is deflected down.
Lay the strip on the wing along the hinge line. Start
at one end of the aileron and lay the strip onto the
surface of the foam on the aileron's leading edge.
|
|
Do not try to lay the entire strip onto the LE. Do it
only a couple of inches at a time. The strip does not have to
be as long as the aileron. You can use short pieces and
butt them together as you apply glue (see next step).
|
|
|
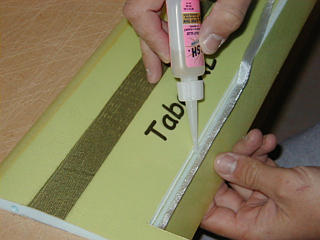
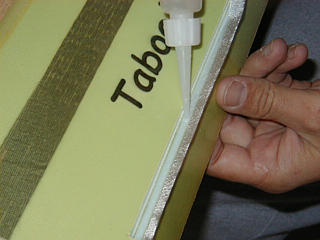
Start from the end of the aileron and
apply foam safe CA glue to the fiberglass strip. Be careful
to apply just enough glue to wet out the fiberglass. Do not
let the glue flow onto the hinge line. This will immediately
result in a stiff hinge and will require a lot of effort
to return the hinge back to the flexible state.
|
|
As you wet out the first portion of the strip, continue
laying it down onto the foam and applying foam safe CA glue
until you get to the tip.
|
|
|
The reinforcement strip does not have to go all the way to the wing
tip. You can stop about 2-4 inches short of the tip.
|
|
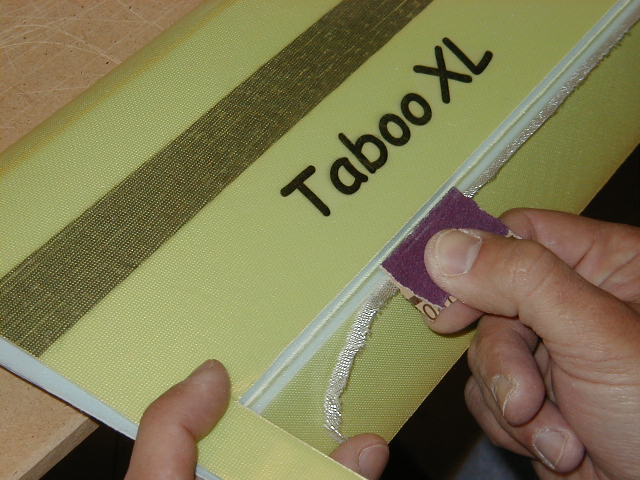
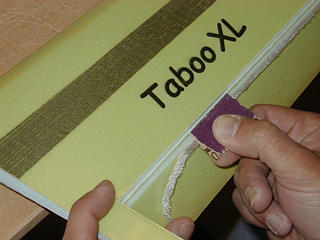
Once the entire strip is glued down, and the glue is
completely set, use a piece of sanding paper to "cut" off
the excess fiberglass. Press on the edge of the aileron and
move the sandpaper along the hinge line until the excess
fiberglass falls off.
|
|
|
Continue sanding the edge until you remove all of the excess
fiberglass. Using sandpaper instead of a knife or a rasor
blade automatically ensures that the reinforcement strip
will not stick out above the wing surface, and allows you
to remove all glue bumps as you go.
|
|
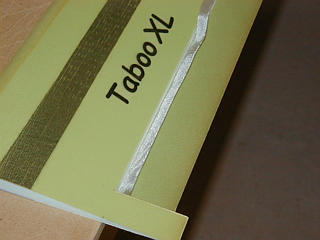
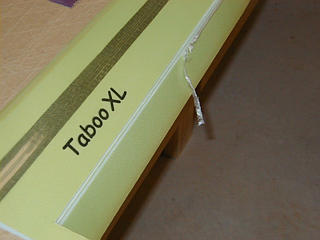
The final result is a much stiffer aileron, and no flutter.
Repeat the procedure with the opposite wing to be sure that
both wings have equal aileron stiffness. It is easier
to do the described procedure before assembling the wing,
but it can also be done successfully on a finished wing. If
you have flown your DLG for a while and your launching
technique improved to the point that you are experiencing
flutter, it is time to take your wing back to the building
table, remove the servos and pushrods if possible, and reinforce
the ailerons with fiberglass.
|

|
|